June 30, 2015

chocolate fudge orange cupcakes.


Wimbledon has officially started and Federer is playing today! What a day full of tennis matches to be enjoyed. Have you tried my Strawberries 'n Cream Wimbledon Cupcakes which I made last weekend? I've seen few pics on Instagram and I would  really love to see more! We're just at the beginning of Wimbledon, so you still have sooo much time to make it. :)

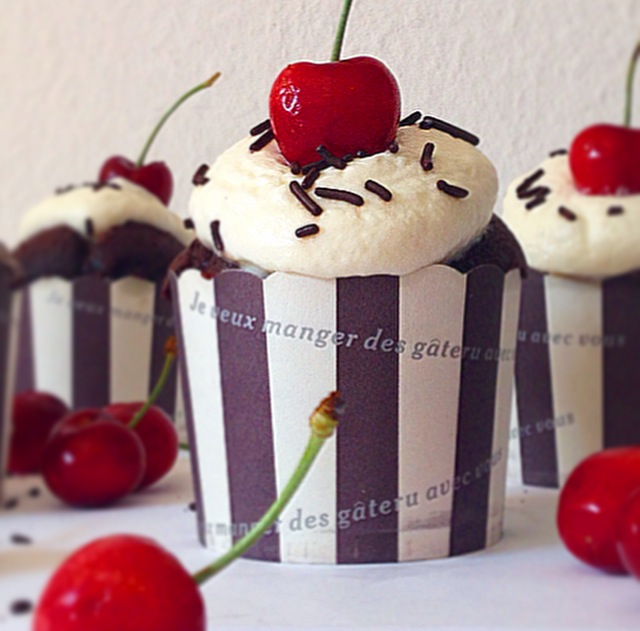
Today, as a companion, I'm sharing with you another great summery dessert you can't ever resist -> Chocolate Fudge Orange Cupcakes!.


Firstly, Vanity Planet - a personal web store, dedicated to bringing you the best, personal care and beauty products which has a strong belief that you can lead a healthier life by making smart health choices every day... and even inspire others to improve their health! - has sent me one of their lovely product: Chef's Circle Digital Kitchen Scale - which you can find the details here: http://vanityplanet.com/diet/chefs-circle-digital-kitchen-scale-722.html.


It's indeed really accurate to use a scale instead of measuring cups or spoons when measuring solids whilst baking or cooking, so their Chef's Circle Digital Kitchen Scale is definitely the BEST option!.


You can have it so much cheaper just by using my Coupon Code "chefcirclelaras" to get a 50% discount! From $40 to only $20! Even, they came not only in one colour but four different colours (white, red, black and yellow). You can see mine is the white one (see the pic above!). Besides all of them, they're also super easy to use. If you guys interested to have it and use it for baking and cooking, you can find all the details here: http://vpwow.com/chefcirclelaras. Seriously a super good quality! :)


These cupcakes are so light, chocolate-buttery cupcakes, fresh and citrusy, and also veeery addictive! :p. Chocolate are always soo good to be mixed with anything. And because too many berries are already involved in my bakes lately, I'm going with Orange this time. Just a perfect twist for Summer!


I used 2 drops of Wild Orange doTERRA essential oils for the cupcake batter (you can easily use a usual Orange extract which you can find in the local supermarket), and I added some candied orange peel for the decoration, just to make a great balance between the chocolate and orange itself.

When Summer is getting hot and the sun is shining brightly every single day (can you believe it's 30 degree Celcius today?!), baking is one of the best thing you can do at home. So, if you have time to try making this, here's the recipe to follow!


Making ca. 6 large cupcakes or 12-14 normal cupcakes.

For the chocolate fudge cupcakes:

Ingredients:

175 grams all purpose flour
50 grams Dutch-processed cocoa powder
240 ml boiling hot water
113 grams unsalted butter, room temperature
200 grams granulated white sugar
2 large eggs, room temperature
2 teaspoons pure vanilla extract
2 teaspoons baking powder
1/4 teaspoon salt

Directions:

1). Preheat oven to 375 degrees F (190 degrees C). Lightly butter, or line 12-14 baking cups with paper liners.
2). In a small bowl, stir the boiling water and cocoa powder until smooth. Let them cool to room temperature.
3). In another bowl, whisk together the flour, baking powder and salt.
3). In a medium-sized bowl, with a hand mixer, beat the butter and sugar until light and fluffy. Add the eggs, one at a time, beating until smooth. Scrape down the sides of the bowl as needed. Beat in the vanilla extract. Add the flour mixture and beat only until incorporated. Then add the cooled cocoa mixture and stir until smooth.
4). Fill each baking cup about two-thirds full with batter and bake for about 16-20 minutes, and a toothpick inserted into a cupcake comes out clean. (Do not over bake or the texture of the cupcakes will be dry).
5). Remove from the oven and place on a wire rack to cool.

For the orange buttercream frosting and assembling:

Ingredients:

1 cup (226 grams) unsalted butter, softened to room temperature
4 cups (460 grams) confectioners or icing sugar
1 teaspoon pure vanilla extract
4 tablespoons milk
2 drops wild orange extract (I used Wild Orange doTERRA essential oils)

candied orange peel, for decoration

Directions:

1). In a large bowl, with a hand mixer, beat the butter until smooth and well blended. Beat in the vanilla extract.
2). With the mixer on low speed, gradually beat in the sugar. Scrape down the sides of the bowl as needed. Add milk and wild orange extract, beat to combine.
3). Then, on high speed, beat frosting until it is light and fluffy (about 5 minutes).
4). Spoon into a piping bag and decorate the cupcakes.
5). At last (after all cupcakes have been perfectly frosted), decorate them with some candied orange peel.
6). Done and serve!.

Enjoy!
Hope you guys like it!

so yummy and flavourful!

You can find me on:


Have a lovely day!

Lots of love,
Laras

June 26, 2015

strawberries 'n cream wimbledon cupcakes.


We're having Wimbledon in 3 days!!!

Oh I'm super duper excited for it! As a huge tennis fan, Wimbledon is definitely my most favourite Grand Slam to watch every single year. The best one. And I just can't wait anymore... :)

Since Wimbledon always reminds me of Strawberries 'n Cream (their traditions include the eating of strawberries and cream by the spectators), today I'm making myself a chic and delicious summery dessert which involved strawberries and cream in it --> Strawberries 'n Cream Wimbledon Cupcakes!.


I'm so happy to finally make this... like I've just officially started the summer season. LOL. :)

The cupcake itself is basically a moist sponge vanilla batter. I made a unique creation by cutting all the cupcakes in half and making a delicious filling. First, I filled each of the cupcakes with homemade whipped cream frosting, then added some sliced strawberries... :) After it, I topped them with the other half of the cupcake, added the whipped cream once again, and also more strawberries (cut them in half), and finally finish them with a dusting of powdered sugar! Soooo yummy!.


It tastes really amazing... sweetlight, fresh and fruitful. Love the cupcakes, love the filling, love the topping. I can't stop staring at the strawberries too! hehe. They always looks so appetizing, aren't they!.


But, if you aren't a big fan of strawberries (or for example you wanna try another fruits and berries), you can easily go with blueberries, raspberries, blackberries or lemon curd instead!. Banana would be amazing too!. I'm personally loving strawberries a lot at the moment, and because we're on the beginning of Summer already and also on the way for Wimbledon to start, I thought strawberries might be my best option to be used for this summery dessert.

If you're excited enough to try this, then just follow my recipe below! I wanna see you guys making this! So easy and so simple!


Making 9-10 normal cupcakes.

For the sponge vanilla cupcakes:

Ingredients:

113 grams unsalted butter, room temperature
130 grams granulated white sugar
3 large eggs, room temperature
1 teaspoon pure vanilla extract
196 grams all purpose flour
1 1/2 teaspoons baking powder
1/4 teaspoon salt
60 ml milk

Directions:

1). Preheat oven to 350 degrees (177 degrees C) and line 9-10 baking cups with paper liners.
2). In the bowl of an electric mixer, or with a hand mixer, beat the butter and sugar until light and fluffy. Add the eggs, one at a time, beating well until each addition. Scrape down the sides of the bowl as needed. Beat in thr vanilla extract.
3). In a separate bowl, whisk together the flour, baking powder and salt. 
4). With the mixer on low speed, alternately add the flour mixture and milk, in three additions, beginning and ending with the flour.
5). Fill the muffin cups with the batter and bake for about 20 minutes or just until set and a toothpick inserted into a cupcake comes out clean. Remember to not over bake or the cupcakes will be dry.
6). Remove from oven and place on a wire rack to cool. 

For the filling and assembling:

Ingredients:

300 ml heavy whipping cream / double cream, whipped to soft peaks
2 tablespoons icing or powdered sugar sifted (optional)
150-200 gr fresh strawberries, sliced

Directions:

1). With a hand mixer on medium-high speed, whip the heavy cream until small peaks have formed.
2). Cut the cupcake in half, then fill with the whipped cream frosting, place the sliced strawberries on top of the cream and top them with the other half of the cupcake.
3). Pipe a little extra whipping cream on top of each cupcake (this is optional), add more strawberries (which are sliced in half) and finish them with a dusting of powdered sugar to make it looks more tempting!.
4). Done and serve!.

Enjoy!
Hope you guys like it!


Have a beautiful weekend!

You can find me on:


yummmyyy!

P.S.: Who are you guys picking to win Wimbledon this year? Let's put a comment bellow.. :) I'm a forever Federer fan, so I hope he can make it for the 8th time! :p we'll see! :)

Lots of love,
@lputriasih

June 23, 2015

no-bake chocolate rolo cheesecake.


Hello again, No-Bake Cheesecake!

After more than two months haven't made any cheesecake recipe (you know I used to make cheesecake a lot!), now I'm back with a super delicious one! Honestly I've been craving this for sooo long... No-Bake Chocolate Rolo Cheesecake!

ROLO! Have you ever heard about it or even tried it before???


Rolo is a brand of truncated-cone-shaped chocolates with a caramel centre. In a short phrase, you can sum it up as a "Chewy Caramels in Milk Chocolate"! Sooo yummy! I started to eat it for the first time and I just couldn't stop at just one bite!

I always love how cheesecake taste. One important thing about making a no-bake cheesecake is that you have to make the crust as well! aaand.. you have to make a delicious one! They will give you that crunchy part - and it's gonna be sooo good when it finally combined with the cheesecake filling itself. The texture of the filling is so light and creamy. An absolute perfect combination. And to make the topping more chocolatey and flavourful, I added a bit of chocolate whipped cream frosting and also... the most important stuff with caramel inside: ROLO!.


This is so incredibly easy to make! But make sure that you make it one day in advance (if you wanna make it for a party or send it as a gift), because you have to chill it for at least 5 hours or better overnight. I always set my cheesecakes overnight till they are able to be sliced perfectly.

Craving for cheesecake already???
Go try this recipe guys.... Here it is to follow!


Making one circle pan (20-23 cm).

For the crust:

Ingredients:

150 grams graham cracker crumbs or digestive biscuits (crushed)
30 grams granulated white sugar
35 grams unsalted butter, melted

For the cheesecake filling:

Ingredients:

227 grams cream cheese, at room temperature
50 grams granulated white sugar
1 teaspoon pure vanilla extract
240 ml heavy whipping cream

Directions:

1). In a large bowl, mix together the crushed biscuits and melted butter.
2). Press onto the buttom of a well greased 8-9 inch (20-23 cm) tart pan with removable bottom. 
3). Covered with plastic wrap and place in the refrigerator to chill (for at least 15 minutes) while you make the filling.
4). In a bowl of your electric mixer, or with a hand mixer, beat the cream cheese until smooth. 
5). Add the sugar and beat until light and fluffy. Scrap down the sides of the bowl and beat in the vanilla extract. Mix all together.
6). In a clean bowl, beat the whipping cream until soft peaks form. 
7). Gradually fold the whipping cream into the cream cheese mixture. 
8). Pour the filling over the chilled crust and smooth the top.
9). Cover and place in the refrigerator for at least 5 hours or better overnight.

For the chocolate whipped cream frosting and assembling:

Ingredients:

460 grams confectioners' or icing sugar, sifted
226 grams unsalted butter, room temperature
1 tablespoon milk or water
3 tablespoons chocolate sauce (store-bought) or melted chocolate
Rolo, for decoration

Directions:

1). In a large bowl, with a hand mixer, beat the butter until smooth and well blended. Beat in the vanilla extract.
2). With the mixer on low speed, gradually beat in the sugar. Scrape down sides of the bowl as needed. Add milk and chocolate sauce/melted chocolate, beat to combine. Then, on high speed, beat frosting until it's light and fluffy (about 5 minutes).
3). Spoon the frosting into a piping bag and decorate the top of the cake (after it's completely set and removed from the fridge), pipe around the edge. Sprinkle on some Rolo's pieces or decorate in any other way you fancy.
4). Done and serve!.

Cut a slice and enjoy!


You can find me on:


Have a beautiful day ahead!

P.S.: I have made many No-Bake Cheesecake recipes to date! If you wanna have a go, then find them here: Cheesecakes' Recipes! Hope you guys enjoy them all!

Lots of love,
@lputriasih

June 17, 2015

black forest birthday cake.


My sweetest little sister is turning 22 today! :)

Oh God, how I miss her A LOT.

Since we live 6898 miles apart right now (I'm in Heidelberg and she's in Jakarta) and we haven't met since last October, I still love her the most and please always know that nothing will ever change.

Today, I baked her a birthday cake from the distance! Yaay. I just want her to know that even I can't be there to celebrate this special day, June 17th each year will remain as the most special day in my heart. :)


Black Forest Birthday Cake! - a simple yet delicious celebration cake which consists of three layers of moist chocolate cake, with vanilla whipped cream frosting between each layer, fresh cherries and chocolate shavings as garnish on top!. If you fancy, you can also added more cherries between each layer too - together with the whipped cream frosting. It might definitely give you more of the sour flavour (but pretty good if you love cherries!). Yummy!

Anyone's having birthday soon??? This would be a perfect option for a birthday gift! Or if you wanna try the simpler one, you can also have a go with my Black Forest-stuffed Cupcakes which I made last week! It tastes delicious as well.


For this cake itself, you can prepare the cake layers up to one day in advance. Just wrap them tightly in a plastic wrap and store at room temperature. Or alternatively, the whole cake could also be prepared up to one day in advance by chilling it in the refrigrator, then let it sit at room temperature for about 30 minutes before serving.


Making a 20-23 cm cake.

For the chocolate cake:

Ingredients:

195 grams all purpose flour
200 grams granulated white sugar
25 grams unsweetened cocoa powder
1 teaspoon baking powder
1 teaspoon baking soda
1/4 teaspoon salt
75 grams unsalted butter, melted
240 ml warm water
1 tablespoon lemon juice (or vinegar)
1 teaspoon pure vanilla extract

Directions:

1). Preheat oven to 350 degrees F (177 degrees C) and place rack in center of the oven.
2). In an ungreased 18 cm circle cake pan, stir together the flour, sugar, sifted cocoa powder, baking powder, baking soda and salt.
3). Add the melted butter, water, lemon juice, and vanilla extract. With a fork, mix all the ingredients together until well blended.
4). Evenly divide the batter between the three prepared pans, smoothing the tops with the back of a spoon or an offset spatula. Bake to ca. 10-15 minutes until a toothpick inserted into the center of the cake comes out clean and the cake springs back when pressed lightly in center.
5). Place the cakes on a wire rack to cool, in their pans, for about 10 minutes. Let them cool completely before frosting.

For the vanilla whipped cream frosting :

Ingredients:

480 ml (2 cups) heavy cream
2 tablespoons icing or powdered sugar
2 tablespoons milk
1/2 teaspoon pure vanilla extract

For topping / decoration:

fresh cherries
50 grams chocolate shavings

Directions:

1). In a large bowl, with a hand mixer on medium-high speed, whip the heavy cream until it reaches stiff peaks. It takes for about 1 minute.
2). Gently fold in the milk and powdered/icing sugar, then add the vanilla extract. (if you like more icing, just double the recipe!).
3). Place one cake layer (bottom side facing up) on your serving plate and spread with about 90 ml of frosting. Place the other cake layer on top of the frosting, spread it again with 90 ml of frosting, then place the last cake layer and cover the entire cake with the remaining frosting.
4). Decorate the cake with fresh cherries on top, then add some chocolate shavings (milk or dark chocolate one) as much as you want or in any other way you fancy. I pressed some chocolate shavings also onto the sides of the cake. Make it beautiful!
5). Done and serve!.

Enjoy! Hope you guys like it!

Devour it!
deliciouuussss...

You can find me on:


Have a beautiful weekend ahead!

P.S.: I also made a short song for my sister. Just 50 seconds. You can listen to it here: https://www.youtube.com/watch?v=4BqNDrNoXY8.

Happy Birthday once again, dear Sista. Love you forever!

Lots of love,
@lputriasih

June 12, 2015

oreo cookies & cream cupcakes.


Few days ago, I summed up all my OREO DESSERTS I've made to date and collaged them in one pic! 

Tadaaaaaa............!!!

I've posted it on my Facebook Page and soooo many people were loving it! Ooooops. Seems like we're all Oreo Lovers! There are sooo many variations of Oreo desserts we're able to create with our own creativity and imagination. They're also one of the best reasons ever to hang out by the dessert table.

And today (TGIF again!), to celebrate the upcoming weekend...  I made a NEW Oreo dessert you'll absolutely love. Hmm... the scrumptious Oreo Cookies & Cream Cupcakes!

Who can say no to Oreo???

The batter of this cupcake is basically a classic dark chocolate cupcake which is so moist and chocolatey! I decided to top them with Cookies and Cream Frosting - the slightly crunchy crushed Oreo cookie was combined into the frosting, then topped them once again with a whole Oreo! Can you imagine how it taste? :)

look at those frosting....

Some people might go with a classic vanilla cupcake instead, but in my opinion Oreo goes along with chocolate for its best flavour!. It's just like... we doubled the chocolate! Really divine. These are also effortlessly easy to make, just less than half an hour to be baked... and to be honest Oreo desserts always look sooo tempting in my eyes, whatever it is. You will want to bake them again and again. 


Let's go making this guys! And let me know how it goes. This would be an easy yet delightful treat for the weekend. Especially when the weather feels like 'Summer' already - which only desserts could help! :p Here's the recipe to follow!


Making ca. 6 large cupcakes or 12-14 normal cupcakes.

For the dark chocolate cupcakes:

Ingredients:

175 grams all purpose flour
50 grams Dutch-processed cocoa powder
240 ml boiling hot water
113 grams unsalted butter, room temperature
200 grams granulated white sugar
2 large eggs, room temperature
2 teaspoons pure vanilla extract
2 teaspoons baking powder
1/4 teaspoon salt

Directions:

1). Preheat oven to 375 degrees F (190 degrees C). Lightly butter, or line 12-14 baking cups with paper liners.
2). In a small bowl, stir the boiling water and cocoa powder until smooth. Let them cool to room temperature.
3). In another bowl, whisk together the flour, baking powder and salt.
3). In a medium-sized bowl, with a hand mixer, beat the butter and sugar until light and fluffy. Add the eggs, one at a time, beating until smooth. Scrape down the sides of the bowl as needed. Beat in the vanilla extract. Add the flour mixture and beat only until incorporated. Then add the cooled cocoa mixture and stir until smooth.
4). Fill each baking cup about two-thirds full with batter and bake for about 16-20 minutes, and a toothpick inserted into a cupcake comes out clean. (Do not over bake or the texture of the cupcakes will be dry).
5). Remove from the oven and place on a wire rack to cool.

For the Oreo cookies & cream frosting:

(this recipe makes enough to frost ca. 12-14 normal cupcakes).

Ingredients:

200 grams unsalted butter, room temperature
425 grams icing or powdered sugar
6 classic Oreos, crushed (by hands or with a food processor)
3-4 tablespoons milk, room temperature

For topping:

12 classic Oreos, or anything else you love. Optional!

Directions:

1). In a large bowl, with a hand mixer, beat the butter until smooth. Gradually beat in the icing sugar until it is all incorporated.
2). Add the finely crushed Oreos and continue to beat for 3-5 minutes until light and fluffy.
3). Add milk slowly until it reached desired consistency. (I found it best with 4 tablespoons of milk!).
4). Pipe the frosting onto the cupcakes and top them with a whole Oreo or anything else you fancy.
5). Done and serve!.

Enjoy and let's cupcake-ing! Hope you guys like it as much as I do!

Oreo Heaven!

You can find me on:


Have a beautiful weekend ahead!

P.S.: So excited for the Gerry Weber Open 2015 next week! Allez RF!

Lots of love,
@lputriasih

June 7, 2015

black forest-stuffed cupcakes.


Finally, one lovely German's dessert is coming on the blog today!.

BLACK FOREST CUPCAKE!

Black Forest Cupcakes are just like black forest cake, but in cupcake form. So simple, yes!. This classic dessert recipe delivers a rich and moist chocolate cupcake - stuffed with delicious cherry pie filling or soaked in cherry liqueur, topped with vanilla whipped cream frosting, chocolate shavings and fresh cherries!.


Just a little information, Black Forest Cake was actually named in the late of 16th century after the Black Forest Region in Germany ("Der Schwarzwald" in German) - which located in the state of Baden-Württemberg. Black Forest Cake is called Schwarzwälderkirschtorte here. (it tastes really good!). Aaaaand.... since I myself live in Heidelberg these days - which is a part of Baden-Württemberg region, I really really wanna go there!.

Personally, I'm not a big fan of cherries because of their sour flavour. I usually go with strawberries or raspberries instead. (you know them well, right?). But, in a small amount - especially as a compliment to any desserts like cake, tart, etc... cherries are really good!. Indeed. So if you haven't tried, then you should at least make it once!

loving fresh cherries... perfect for this kinda weather!

These Black Forest Cupcakes are light, fluffy and definitely have moist texture. The Cherry Pie filling inside is also delicious! If you have much time to bake, you can make a homemade one at home. I just bought it in the supermarket to make it a bit simpler and easier, but really... cherries and chocolate are going really well together!. Such a perfect pair.

If you are one cupcake lover and haven't tried to make the Black Forest one, you can follow my recipe here!


Making ca. 6 large cupcakes or 12-14 normal cupcakes.

(I made 6 large cupcakes using lovely Paper Baking Cups from Paper Eskimo).

For the chocolate cupcakes:

Ingredients:

175 grams all purpose flour
50 grams Dutch-processed cocoa powder
240 ml boiling hot water
113 grams unsalted butter, room temperature
200 grams granulated white sugar
2 large eggs, room temperature
2 teaspoons pure vanilla extract
2 teaspoons baking powder
1/4 teaspoon salt

For the filling:

1 can Cherry Pie Filling (store-bought)


Directions:

1). Preheat oven to 375 degrees F (190 degrees C). Lightly butter, or line 12-14 baking cups with paper liners.
2). In a small bowl, stir the boiling water and cocoa powder until smooth. Let them cool to room temperature.
3). In another bowl, whisk together the flour, baking powder and salt.
3). In a medium-sized bowl, with a hand mixer, beat the butter and sugar until light and fluffy. Add the eggs, one at a time, beating until smooth. Scrape down the sides of the bowl as needed. Beat in the vanilla extract. Add the flour mixture and beat only until incorporated. Then add the cooled cocoa mixture and stir until smooth.
4). Fill each baking cup about two-thirds full with batter and bake for about 16-20 minutes, and a toothpick inserted into a cupcake comes out clean. (Do not over bake or the texture of the cupcakes will be dry).
5). Remove from the oven and place on a wire rack to cool.
6). Once the cupcakes cool down perfectly, cut the center of the cupcake out with a sharp knife. Fill the center of each cupcake with (store-bought) Cherry Pie Filling. I put 2-3 cherries in each and it's pretty good enough. You can add more as much as you like!.

For the vanilla whipped cream frosting and assembling:

Ingredients:

240 ml (1cup) heavy cream
2 tablespoons icing or powdered sugar
1 teaspoon pure vanilla extract
chocolate shavings, chocolate sprinkles or chocolate chips (for topping)
fresh cherries (for topping)

Directions:

1). Place the sugar into a mixing bowl and add the heavy cream.
2). Whisk until the cream reaches stiff peaks (you can also use a handmixer). It takes for about 1 minute.
3). Spoon into a piping bag and frosting over each cupcake. Sprinkle them with chocolate shavings, chocolate sprinkles or chocolate chips, then add fresh cherries on top.
4). Done and serve!.

Enjoy! Hope you guys like it!
Have a blessed Sunday!

can't handle the chocolate! :)

You can find me on:


Lots of love,
@lputriasih

June 4, 2015

5-ingredients nutella & giotto fudge.


Hi everyone!

The yummiest little bites I've ever tasted so far.... 
Nutella & Giotto Fudge! and it ONLY needs 5 ingredients to be done!.

My first time adding Giotto to my baked goods, and it was a big success.

The story goes like this...
I went to a supermarket two days ago and was actually looking for Ferrero Rocher chocolate to be combined with Nutella to make this fudge, but I didn't find it. Hmm, then I accidentally found Giotto on the other side of the rack (which is my super favourite chocolate too!) and I thought... why not??! Why not replacing the Ferrero Rocher into Giotto? Both contain hazelnuts and would be perfect for a Nutella treat. Yaaay!

What's the best name of this treat? Nutella Fudge? Nutella Bars? Nutella Squares? or Nutella Bites? Whatever it called... it tastes HEAVENLY. To be honest, I couldn't stop eating bites after bites once I cut them and kept eating them instead of trying to make a great photoshoot! Ooops. :p Nutella is an addiction. Always!.

look at that! 

This recipe is basically a Nutella Fudge recipe. That's why the Giotto-part is only an option! But as I already said, the chopped and crunchy Giotto makes the Nutella fudge tastes more hazelnutty! - as expected. Sooo, they are indeed a perfect pair.

If you're looking for a great Nutella dessert once again, this could be your newest "best friend". It's easy to make, no baking needed, the hazelnut flavour from Nutella & Giotto and the cocoa sweet flavour from the dark chocolate are the ones that will blow anyone away. So yummy... don't forget it only requires 5 ingredients and you will want to make it again and again!.

Go make this guys... Here's the recipe to follow!


Making ca. 25 squares.

Ingredients:

1x400grams can condensed milk
300 grams dark chocolate, chopped
200 grams Nutella
25 grams unsalted butter (can be salted)
80 grams icing or powdered sugar (you can reduce it a bit if you find it sweet enough!)
15 Giotto, chopped (optional)

Directions:

1). Line a 7 inch (20 cm) tin with parchment paper.
2). Put the chopped chocolate into a heavy based pan, along with the condensed milk, Nutella and butter. Stirring them so often so the chocolate won't burn.
3). Once melted, tip in the icing sugar and combine well. If you use the Giotto chocolate as well, stir in the chopped Giotto into the mixture! Mix them once again with a spatula. (slowly, not to over-mix!). Then pour into the tin - smooth over the mixture.
4). Chill in the fridge for at least 2 hours until firm and they can be sliced/cut perfectly.
5). Done and serve!

Cut into squares....

one bite will never enoughhhh....

Enjoy!
Hope you guys like it!

yummmyyy!!!

You can find me on:


Lots of love,
@lputriasih