April 27, 2015

maltesers peanut butter cupcakes.


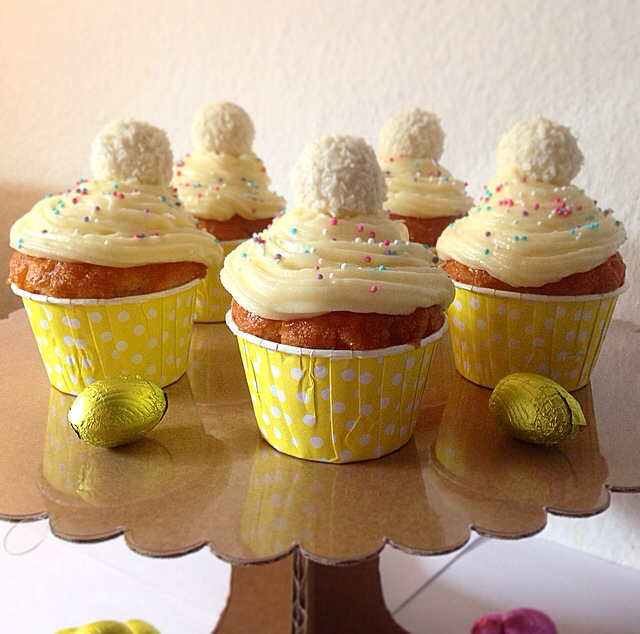
Let's say "HELLO" to another Homemade Cupcakes!

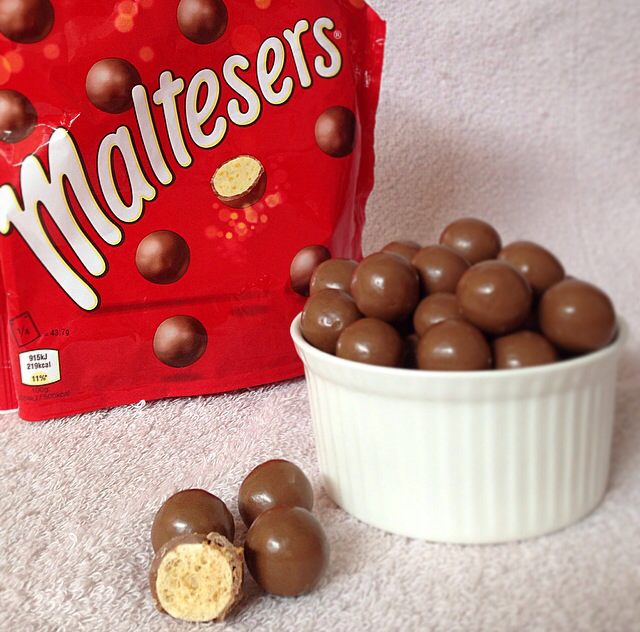
I've been searching for Maltesers for so long, but I couldn't find it. Anywhere. But yesterday, thank God I finally found it in a larger supermarket here in Heidelberg! Yaay!! So, if any of you haven't heard or taste it before, Maltesers is one kind of chocolate (similar product to Whoppers) which are made in two stages. The inner crunchy part is made by making small pellets of a dough like mixture. The pellets are then coated with milk chocolate and polished. It's super duper yummy! I've found many bakers all over the world are also a BIG FAN of Maltesers and they baked so many desserts using Maltesers as well.

MALTESERS!

Today, as a collaboration project with Klara Form from Sweden, I'm baking these scrumptious Maltesers Peanut Butter Cupcakes!. Peanut butter lovers can double their pleasure with this treat!.


Firstly to say, I'm soo happy to get sponsored by Klara Form to do this post. They are an online baking shop which based in Sweden. They sent me their lovely rainbow baking cups and also pink-heart cupcake toppers! Honestly I'm sooo in love with them... They're so cute and colourful. If you're looking for lovely and adorable baking goodies, it's best to check out their website at klaraform.se! You can find many more inspirations and ideas. :)))

how adorable are these stuffs!
thank you! :)

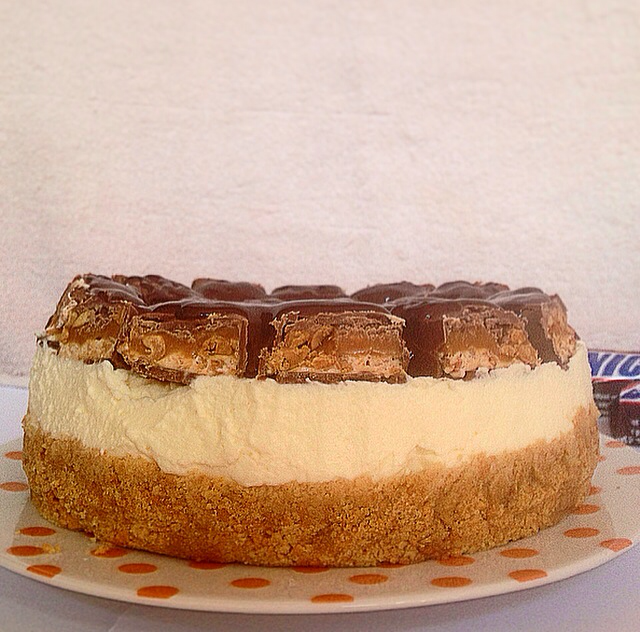
So, here's my Maltesers Peanut Butter Cupcakes using their lovely baking products... And the pink plate was from my one and only little sister! She has always been the sweetest - sent it all the way from Indonesia - together with many other surprises as my birthday present last February. 


These cupcakes are so yummy, the texture is moist, they have a good peanut butter flavour - especially by the frosting! Besides that, the peanut butter frosting is so creamy and not over-powering! And even at last, the Maltesers is one important thing which gave you that chocolatey flavour and crunchiness! :)

loving my colourful presentation today!

If you are a peanut butter lover, or chocolate lover, or cupcake lover, whatever it called... Go make this to sweeten your day! Baking cupcakes is always a fun thing to do, so does making frosting. Here's the recipe to follow!


Making 9-10 cupcakes.

For the vanilla peanut butter cupcakes:

Ingredients:

113 grams unsalted butter, room temperature
130 grams granulated white sugar
3 large eggs
1 teaspoon pure vanilla extract
196 grams all purpose flour
1 1/2 teaspoons baking powder
1/4 teaspoon salt
60 ml milk
2 tablespoons creamy peanut butter (we don't want it too much because we still gonna make a peanut butter frosting!).

Directions:

1). Preheat oven to 350 degrees (177 degrees C) and line 9-10 baking cups with paper liners.
2). In the bowl of an electric mixer, or with a hand mixer, beat the butter and sugar until light and fluffy. Add the eggs, one at a time, beating well until each addition. Scrape down the sides of the bowl as needed. Beat in thr vanilla extract.
3). In a separate bowl, whisk together the flour, baking powder and salt. 
4). With the mixer on low speed, alternately add the flour mixture and milk, in three additions, beginning and ending with the flour. Add the peanut butter, mix until well combined.
5). Fill the muffin cups with the batter  and bake for about 20 minutes or just until set and a toothpick inserted into a cupcake comes out clean. Remember to not over bake or the cupcakes will be dry.
6). Remove from oven and place on a wire rack to cool. 

For the peanut butter frosting and assembling:

Ingredients:

1 cup (226 grams) unsalted butter, softened to room temperature
4 cup (500 grams) confectioner or icing sugar
1/4 cup milk
2 teaspoons pure vanilla extract
2 cup creamy peanut butter
+/- 40 grams Maltesers 

Directions:

1). After the cupcakes are completely cool, we can start with the frosting. In a large bowl, using a stand mixer with a paddle attachment or a hand mixer, beat the butter and peanut butter together.
2). Add half of the icing sugar, blend them until smooth.
3). Then add milk and vanilla extract, and gradually add the remaining icing sugar. Stir them until well blended.
4). Spoon the frosting into a piping bag and decorate the cupcakes.
5). After the cupcakes are all covered with frosting, top them with Maltesers. I put three on top of each cupcake. (You can add more or less, it's all optional!).
6). At last, I inserted the cupcake toppers for an even cuter decoration.
5). Done and serve!.

Enjoy!
Hope you guys like it!

Sometimes...
life is better with Homemade Cupcakes!

Have a blessed week ahead everyone!

You can find me on:


Lots of love,
@lputriasih

April 24, 2015

2-ingredients-nutella mousse.


Easy. Simple. Sweet. NUTELLA GOODNESS!

Because I had a quite tough week, I wanna end it with some Nutella dessert to bring myself a little joy. And.... this 2-Ingredients-Nutella Mousse is one perfect idea! 


How brilliant it is - you can make a mousse just by combining 2 stuffs: Nutella and heavy cream. So easy and fun to make. The decoration of what I've made here (with fresh raspberries and double cream Oreo is optional, so if you don't have time to buy another ingredients in the supermarket or you don't have any ingredient left in your kitchen, don't worry! These 2 stuffs are indeed enough. Leave the Nutella itself, it tastes heavenly already. So simple, yes! 


The texture of the mousse is sooo creamy, silky and also light. And I don't know if anyone in this world doesn't love Nutella??? hehehe... it seems like IMPOSSIBLE!


So, do yourself a favor and go make this completely no-bake dessert this weekend! I would love to see you making this 'cause it's a must try. Here's the recipe to follow!


Making 8-10 small bowls or serving 6 parfait glasses.

Ingredients:

320 grams Nutella
2 cups (480 ml) heavy cream, cold

fresh raspberries (optional)
double cream Oreo (optional)

Directions:

1). Place the Nutella in a large bowl. If the texture of the Nutella is a bit too thick, microwave it for just a few seconds to soften it. Then, let it cool slightly to room temperature.
2). With a hand mixer, whisk the heavy cream until reach soft peaks form (about 1,5 minutes on medium high speed). Add 3 tablespoons of the whipped cream to the Nutella bowl and whisk with a spatula until smooth. Gently fold in the rest of the whipped cream, continue to mix them (with the spatula) until well combined and really smooth. Remember to not overmix.
3). Chill the mousse in the fridge for at least 2 hours OR you can serve it directly.
4). Decorate the top of the mousse with fresh raspberries and double cream Oreo. But as I said before, this is only an option! And if you wanna try another stuffs, you can decorate them with hazelnuts, Ferrero Rocher chocolate, or even chocolate chips. (Try to find something crunchy for topping!).

A little tips: The texture of mousse is usually really soft, so it's better to be chilled first in the fridge before you serve it. It takes a lil' time (at least 2 hours)... but at the end, I can guarantee you for enjoying one of the yummiest and easiest Nutella dessert ever!

Enjoy!

Nutella Heaven!

If you're still looking for another Nutella desserts, you can find my other recipes: Double Nutella Mille Crepe Cake and Nutella-based Strawberry Cheesecake!

Have a lovely day everyone!

You can find me on:


Lots of love,
@lputriasih

April 22, 2015

5-ingredients-pistachio panna cotta.


This is one of the simplest and eyes-pleasing desserts there is. Pistachio Panna Cotta! and the best thing is that you ONLY need 5 ingredients to make it! How amazing??

Yes. I looove making Panna Cotta. Always always always love it. My previous Panna Cotta recipe: Strawberry Panna Cotta Parfaits was made one month ago, so I'm craving for another one and wanna try something different too!


After searching for some inspirations, I go with Pistachio today! Honestly I do really love my photoshoot for these 'little bowls' dessert'. Somehow the colours just matched each other without missing the gorgeous-and-elegant-look of the Panna Cotta itself.

really in love with my photoshoot...
raspberries always make a great pic!

It takes some time to chill it on the fridge, and this might test your patient a bit while hoping and keeping the faith that the cream will set! :p but don't worry, if you follow the recipe exactly the way it goes, trust me! Your wait is well worth it.


The Panna Cotta is soo creamy, sweet, delicious, and of course pistachio-ey. Well, don't know how to say it!. But pistachio (paste and nuts) really goes well to be combined to this. Another variation of just a classic strawberry Panna Cotta, why not?


If you have something big at home coming up these weekend, or maybe in the upcoming week, you can serve these gorgeous Panna Cotta dessert. I'm pretty sure they'll love it! Here's the recipe to follow!

simply elegant.

Making 6 small bowls.

Ingredients:

7 gr unflavored powdered gelatin
60 ml cold milk
540 ml heavy whipping cream
60 grams powdered or icing sugar
1-2 tablespoons of pistachio paste

finely ground pistachio nuts (optional)
fresh raspberries (optional)

Directions:

1). In a small bowl, sprinkle the gelatin over the cold milk and let this mixture sit for about 5 until 10 minutes. It will soften, sell and become spongy.
2). Meanwhile, combine the cream and sugar in a medium saucepan and bring it just to a boil, stirring to dissolve the powdered sugar.
3). Once the cream is already hot, remove the saucepan from the heat and stir in the gelatin mixture. Stir until the gelatin has completely dissolved. Then stir in the pistachio paste.
4). Pour the cream into small bowls and place in the refrigerator to chill for at least 4 hours or overnight, until they're completely set.
5). Sprinkle the top with chopped pistachio nuts, and decorate with fresh raspberries to make the presentation even prettier and (more) fresh! (This step is optional. If you wanna stay simple with only 5-ingredients needed, don't worry. Just leave this step. Your panna cotta will still look classy and elegant!).

Enjoy! Hope you like it as much as I do!

another heaven on your table!

You can find me on:


Lots of love,
@lputriasih

April 18, 2015

spring time banana cupcakes.


I feel honoured to collaborate with selfpackaging.com for creating a great recipe and presenting them using their lovely Cake Stand!

They are based in Barcelona nowadays and I'm soo in love with their products! So many lovely little boxes with cute designs and also baking goodies on their shop, and they're all looking great! You can find many inspirations there. If you wanna take a look, go visit their website selfpackaging.com or follow them on Instagram @selfpackaging! Thank you to the lovely Elisabet for sending me these... all the way from Barcelona to Germany. I'm grateful! :)

thank you!

SPRING has officially started and Heidelberg is having a spring heatwave until 27 degress these days!. Finally there's a sun after a very long winter. And to celebrate the beginning of Spring (which is so wonderful), I decided to bake another cupcakes and named them: Spring Time Banana Cupcakes!.

Look at that gorgeous cake stand!
also using the yellow baking cups from @icedjems!

It's always a great idea to bake something with banana - a very consistent-quality fruit, which is available to be made anytime of the year. Yes, it's just perfect for any ocassion. Banana cupcake tastes actually quite the same with banana loaf or banana cake. The texture is wonderfully moist, fluffy, and the flavour remains sweet! I do really like it!


On other side, the cream cheese frosting will give you a great combination. It's creamy and just sweet enough to complement any cupcake without overwhelming it. Don't forget that we also have the sprinkles and Raffaello chocolate as topping! Soo yummy! And those sprinkles captured the celebration of Spring, anyway!

perfectly frosted and sprinkled!

Let's have a go guys!
Here's an easy-to-follow recipe to try!


Making 12 regular cupcakes.

For the banana cupcakes:

Ingredients:

230 grams all-purpose flour
150 grams granulated white sugar
1 teaspoons baking powder
1/4 teaspoon baking soda
1/4 teapoon salt
1 teaspoon ground cinnamon
2 large eggs, lightly beaten
113 grams unsalted butter, melted and cooled
3 ripe large bananas, mashed well (about 1-1/2 cups)
1 teaspoon pure vanilla extract

Directions:

1). Preheat oven to 350 degrees F (180 degrees C).
2). In a large bowl combine the flour, sugar, baking powder, baking soda, salt and cinnamon.
3). In a medium-sized bowl combine the mashed bananas, eggs, melted butter and vanilla. 
4). With a rubber spatula or wooden spoon, lightly fold the wet ingredients (banana mixture) into the dry ingredients just until combined and the batter is thick and chunky. Don't overmix!
5). Spoon the batter into the prepared baking cups.
6). Bake for about 20-25 minutes until a toothpick inserted in the center comes out clean.
7). Place on a wire rack to cool for 5-10 minutes and we're done with the cupcake batter!.

For the cream cheese frosting and assembling:

Ingredients:

16 oz. (452 grams) cream cheese (Philadelphia is best!)
2 sticks (226 grams) unsalted butter, softened
2 cups (250 grams) confectioner or icing sugar
1 teaspoons pure vanilla extract
12 Raffaello chocolate (optional)
sprinkles (optional) 

Directions: 

1). Using a stand mixer with a paddle attachment or a hand mixer (at low speed), combine the cream cheese, unsalted butter, icing sugar and pure vanilla extract in a large bowl, and beat them until sugar is incorporated.
2). Increase speed to medium high and beat until frosting is light and whipped, about 3-4 minutes. 
3). Spoon the frosting into a piping bag and decorate the cupcakes!.
4). After the cupcakes are all covered with frosting, spread some sprinkles and at last top them with Raffaello chocolate.
5). Done and serve!.

Enjoy! Hope you all like it!

you can't stop at just one bite!

P.S.: Soon collaborating with a great baking shop KlaraForm from Sweden next week... and again honoured to be contacted to make a NEW recipe for the doTERRA website! Soon! So, stay tuned everyone!

and if you fancy giving a like on my Facebook Page, you can visit me at https://www.facebook.com/lputriasih :) thank you so much!

You can find me on:


Lots of love,
@lputriasih

April 15, 2015

no-bake snickers cheesecake.


How I love SNICKERS!

Proudly to say, I just made THE BEST NO-BAKE CHEESECAKE (in my version) so far! 

Firsty, the inspiration came up when I was in the supermarket the day before. I accidentally saw that Snickers were on a big discount! :p. Hmm, not even thinking about it, I directly put them in my plastic bag then brought them into the cashier. 

SNICKERS!

If you have been following my blog for a while, you know for sure that I really love making cheesecake for some reasons. No-Bake Salted Caramel Banoffee Cheesecake3-Ingredients Oreo Cheesecake Truffles and Nutella-based Strawberry Cheesecake were already a check list!.

i love this 'whole-cake' look! how gorgous! 

This time (after realizing I haven't baked any cheesecake this month), I made this delicious No-Bake Snickers Cheesecake!. With a combination of buttery crust, cream cheese, Snickers and a drizzle of melted dark chocolate as topping, this no-bake dessert is a must try! The crust is indeed buttery yet crunchy. The filling is soo light and creamy. It has a perfect texture you'll absolutely love!


And if you are a big fan of peanut butter, Snickers isn't a mistake. (you're guaranteed for this!). It contains chocolate, nut and nougat, and has a super rich texture (so nutty, so fudgy!). That's why all peanut butter lovers will definitely love it... and when it added to a cheesecake, it's a pure indulgence. Let's try this everyone! I would love to see you making this! :)

Here's the recipe to follow!


Making one circle pan (20-23 cm).

For the crust:

Ingredients:

150 grams graham cracker crumbs or digestive biscuits (crushed)
30 grams granulated white sugar
35 grams unsalted butter, melted

For the cheesecake filling:

Ingredients:

227 grams cream cheese, at room temperature
50 grams granulated white sugar
1 teaspoon pure vanilla extract
240 ml heavy whipping cream

Directions:

1). In a large bowl, mix together the crushed biscuits and melted butter.
2). Press onto the buttom of a well greased 8-9 inch (20-23 cm) tart pan with removable bottom. 
3). Covered with plastic wrap and place in the refrigerator to chill (for at least 15 minutes) while you make the filling.
4). In a bowl of your electric mixer, or with a hand mixer, beat the cream cheese until smooth. 
5). Add the sugar and beat until light and fluffy. Scrap down the sides of the bowl and beat in the vanilla extract. Mix all together.
6). In a clean bowl, beat the whipping cream until soft peaks form. 
7). Gradually fold the whipping cream into the cream cheese mixture. 
8). Pour the filling over the chilled crust and smooth the top.
9). Cover and place in the refrigerator for at least 5 hours or better overnight.

For the topping and assembling:

Ingredients:

200 gr dark chocolate, melted
1 pack Snickers (ca. 350-400 gr), cut into squares

Directions:

Sprinkle the chopped Snickers over the cheesecake until it all covered. Gradually drizzle/pour the melted dark chocolate over it. Yummy! We're done and let's serve.

Anyway, you can decorate it any other way with your own creativity! And besides of melted chocolate, you can also cover the top with ganache or even (salted) caramel sauce.

Cut a slice and enjoy!

heaven on my plate!

P.S.: thank you soo much everyone - for all the 'LIKE' on my Facebook Page! It really means a lot for me. And I update it each day, so if you wanna see more of my bakes or anything comes up with baking thing and baking stuffs, you can find me there!


Thank you! :)

You can find me on:


Lots of love,
@lputriasih

April 11, 2015

chocolate cupcakes with matcha frosting and ovomaltine topping.


Who loves Matcha???

For anyone who hasn't heard about it before, Matcha is finely milled or fine powder green tea which came from Japan. Nowadays, it's mostly enjoyed as desserts. Matcha Ice Cream, Matcha Cheesecake, Matcha Tiramisu and many more. People also enjoy themself drinking Matcha Latte, and maybe you're one them too. In Japan, we also can find Matcha Kit-Kat and it's even so popular there! (now it's been distributed all over the world).

simple... i'm in love with today's green-theme!

Matcha powder can usually be found at any tea-shops or grocery stores. Indonesian people love Matcha A LOT. Everything comes up with Matcha will be like a trend. The newest thing I heard lately is "Kue Cubit Green Tea". Seems so unique and I do really wanna try it when I'm home. 

Here in Germany, Matcha is hardly to be found in the local market. So selten. I didn't find it at any tea-shops too. I'm only able to buy it in Asia Market, but thankfully I got one. :)

the inside of the cupcakes!

Look at that! These cupcakes are moist, light, fluffy, definitely chocolatey, and the green tea frosting has a comforting flavour that warms you right up. Even, you have a bit of Ovomaltine chocolate as topping! Double chocolat-EY.

enjoying the cupcakes with a glass of lemon squash
(and lovely green-stripes paper straws from @icedjems' shop!)

If you haven't tried this, then you should give it a try! I bet you'll love the combination of chocolate and green tea together! Something unique you can't found in any other desserts.

Here's the recipe to follow!

the look from top!
can you spot the "OVOMALTINE"?

Making max. 12 cupcakes.

For the chocolate cupcakes:

Ingredients:

175 grams all purpose flour
50 grams Dutch-processed cocoa powder
240 ml boiling hot water
113 grams unsalted butter, room temperature
200 grams granulated white sugar
2 large eggs, room temperature
2 teaspoons pure vanilla extract
2 teaspoons baking powder
1/4 teaspoon salt

Directions:

1). Preheat oven to 375 degrees F (190 degrees C). Lightly butter, or line 12-14 baking cups with paper liners.
2). In a small bowl, stir the boiling water and cocoa powder until smooth. Let them cool to room temperature.
3). In another bowl, whisk together the flour, baking powder and salt.
3). In a medium-sized bowl, with a hand mixer, beat the butter and sugar until light and fluffy. Add the eggs, one at a time, beating until smooth. Scrape down the sides of the bowl as needed. Beat in the vanilla extract. Add the flour mixture and beat only until incorporated. Then add the cooled cocoa mixture and stir until smooth.
4). Fill each baking cup about two-thirds full with batter and bake for about 16-20 minutes, and a toothpick inserted into a cupcake comes out clean. (Do not over bake or the texture of the cupcakes will be dry).
5). Remove from the oven and place on a wire rack to cool.

For the matcha frosting and assembling:

Ingredients:

2 sticks unsalted butter, softened
3-4 cups confectioner or icing sugar (depends on how much you want the icing to be sweet! 3 cups of sugar works better for me)
3-4 tablespoons milk
2 tablespoon matcha (green tea) powder
1-2 drops green food coloring (optional)
1 pack of Ovomaltine chocolate (optional)

Directions:

1). In a bowl of an electric mixer or with a hand mixer, mix together the softened butter and sugar, blend well.
2). Add in the milk and matcha powder, beat until light and fluffy. (You can add one or two drops of green food coloring to make the colour of the icing a bit more greeny).
3). Chop the Ovomaltine chocolate, put each of them on top of the cupcakes.
4). Done and ready to serve!

one will never enough!

Enjoy! Hope you guys love it! Happy weekend!

You can find me on:


Lots of love,
@lputriasih

April 8, 2015

no-bake oreo 'n' chocolate tartlets.


"Good things come in small packages!"

This caption says it all.


These tartlets are as chic as they are simple. The filling requires no baking, so after a few hours in the fridge (or you may also serve them right away), just slice and serve. OR, because they're indeed in mini-sizes form (that's why they're called "TARTLETS"), you can just simply take a bite! 


Oreo 'n Chocolate Tartlets! This is my first post-Easter baking. Honestly I didn't feel really well these past few days, so I'm really happy I could bake again earlier today. :)


A rich chocolate tart filling that doesn't need any baking - always be one of my readers' favourite!. Remember the last time when I made no-bake chocolate truffle tart crunch? It still remains one of the most-viewed recipes on the blog. I have no idea how the no-bake recipes and chocolate always win! :)


So, if you're also a fan of no-bake desserts, you should try yourself this one. It's so yummy, creamy, crunchy and unavoidable chocolatey. You might not miss the Oreo crunbles on top too! Oreo and chocolate always successfully make one of the best combinations, aren't they?


And last week, one of my friends told me this, "Know what? sometimes no-bake desserts are the best things in the world." - indeed!

There you go!


Making 6 mini tarts / tartlets.

For the shell:

I used a prepared tart shell which called "wiener tartlets", then I baked them once again on a cookie sheet just for a few minutes. After they're baked, remove from heat and let them cool completely! (make sure your tartlets are cool completely before you fill them with the chocolate filling).

For the chocolate filling and assembling:

Ingredients:

1 cup powdered sugar
2 tablespoons unsweetened cocoa powder
1 tablespoon unsalted butter, softened
1-2 tablespoons orange juice / milk
1/2 pack Oreos

Directions:

1). In a large bowl, with a hand mixer, combine the sugar, cocoa powder and softened unsalted butter. Mix until well incorporated.
2). Add the orange juice or milk, stir until completely blended.
3). Pour the filling into the cooled tartlets, chill them in the refrigerator for at least 2-3 hours until it completely set, or just serve them directly! (as you wish).
4). Chopped Oreos in small forms, put on the top of the chocolate fillings. 
5). Done and ready to serve!


Enjoy!
Have a blessed day everyone!

You can find me on:


Lots of love,
@lputriasih

April 3, 2015

pink easter cupcakes.


EASTER is coming soon!

Have you baked something or still have a plan to bake something big this weekend? These lovely "Pink Easter Cupcakes" (Vanilla Cupcakes with Raspberry Buttercream Frosting) could be one of the best options for you!

Few days ago, I received a bunch of lovely baking goodies from the talented Jemma Lloyd who is also blogging at http://www.icedjems.com/. These beauties are from her own baking shop! See how cute and adorable they are. :)


And as you all know, I'm a huge pink lover! That's why the first goodies I've chosen were the pink ones. Yes, today Easter's theme is ALL PINK. And besides Easter which is just around the corner, I also wanna enjoy Spring at its best.


One of my favourite things about Spring is the enjoyment of fruits at the peek of its season (summer is also not too far anymore!), as delicious as fresh fruits on its own. My vanilla cupcakes are topped with the raspberry buttercream icing, and I also added just a drop of red food coloring to make the icing a bit more pinky.


Raspberries or strawberries are always a good idea if you go with berries. Always. Of course you can also choose blueberries or blackberries instead. But today, 'cause I wanna make something "pinky-themed" to be matched with the colour of my baking cups, I go with fresh raspberries.

It's moist, fruity, delicious. As simple as that.
You'll never go wrong with pretty pink cupcakes!


So, this is my last-minute Easter baking!
If you wanna have a go, just follow this recipe. You still have enough time to please and share your love with your loved one(s) in the upcoming Easter day. Enjoy!


Making max. 12 cupcakes.

For the vanilla cupcakes:

Ingredients:

195 grams all purpose flour
200 grams granulated white sugar
1 1/2 teaspoons baking powder
1/4 teaspoon salt
113 grams unsalted butter, at room temperature, cut into small pieces
2 large eggs, room temperature
1 1/2 teaspoons pure vanilla extract
120 ml sour cream or plain yoghurt, room temperature

Directions:

1). Preheat oven to 350 degrees F (180 degrees C) and lightly butter or line 12 muffin cups with paper liners.
2). In a bowl of your electric mixer, or with a hand mixer, beat the flour, sugar, baking powder and salt until combined. 
3). Add the butter, eggs, vanilla extract and sour cream (or yoghurt). Beat the wet and dry ingredients together, at medium speed, until the batter is smooth and satiny, about 30-60 seconds. Scrap down the sides of the bowl as needed.
4). Evenly fill the muffin cups with the batter and bake for about 20-25 minutes or until lightly browned and a toothpick inserted into a cupcake comes out clean. Remove from the oven and place on a wire rack to cool.

For the raspberry buttercream frosting:

Ingredients: 

250 gr (1 stick) unsalted butter, softened
1/2 cup raspberry preserves
1/2 tsp vanilla extract
160z (1 pack) confectioner/powdered sugar

Directions:

1). In a large bowl, combine together all the frosting ingredients and mix together to combine.
2). Add the frosting in a piping bag fitted with a large star tip and pipe the frosting onto the cupcakes.

For assembling:

Because Easter is coming REAL soon and you must be longing to make a pretty Easter decoration, topped your frosted cupcakes with mini Easter eggs!! Mine is using the mini Easter eggs from MILKA. It contains one of the best milk chocolate! So delicious, chocolatey and creamy! :)

(it's optional, just use any beautiful stuffs you want for decoration. Make it beautiful!).

Now take a bite and enjoy!


HAPPY GOOD FRIDAY and also HAPPY EASTER (in advance) everyone! Have a great celebration! These lovely cupcakes will absolutely brighten your day! :)

God bless you!

You can find me on:


Lots of love,
@lputriasih